Connecting a DHT-22 Sensor to Home Assistant

Note: This post was originally posted on my personal blog. I have copied the content to this blog.
I wanted to measure temperature and humidity and the options to do so in pre-built packages that integrate with Home Assistant all fell short, so I made my own. Why would you want to do something like this? Here are some examples of things you can create:
- Put a sensor at the base of your hot water heater and alert if humidity hits 95% which might indicate the water heater burst (this is what I’m doing)
- Add a temperature sensor and incorporate it to your smart thermostat to ensure a specific room hits the temperature you want
- Put a sensor in your bedroom or bathroom that activates a smart plug with a dehumidifier on it that when it goes above 70% it kicks on to dehumidify after your shower
- Put a sensor in a plant or grow tent to trigger automatic watering
- Put a sensor in a closet to monitor the humidity to ensure your clothes don’t get moldy
To achieve this, you need:
- Home Assistant (already configured with MQTT integration)
- An MQTT broker running on your network
- MQTT Explorer (or any applicable MQTT viewer/reader)
- Raspberry Pi (with an OS on it, I used Raspbian)
- 40 pin header
- DHT-22 sensor
- Soldering tools
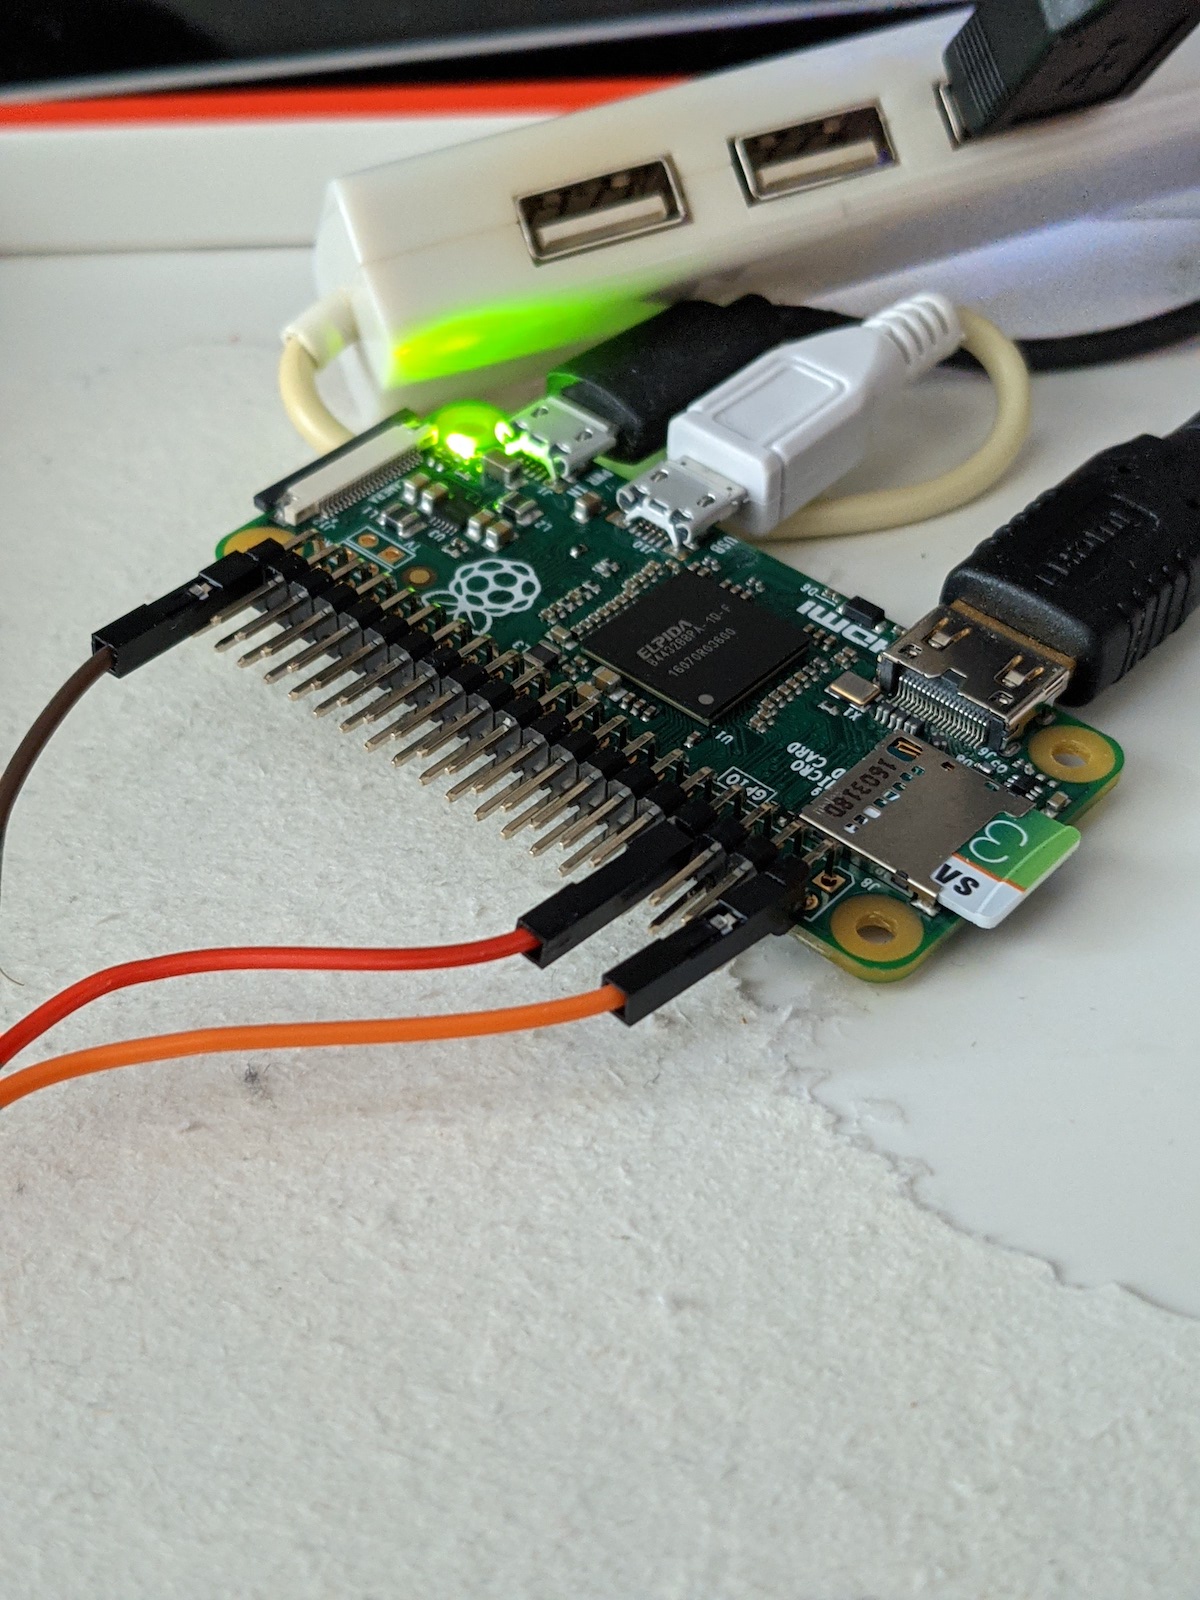
First, disconnect the Pi and solder the 40 pin header to it. Now connect the DHT22 to your Pi. Mine already had a pulldown resister installed on a small circuit board so I connected it directly to the Pi.

In this image, positive is orange, out is red and negative is brown. Also note that they are connected on the higher pins (which correspond to the inner side). This board is rotated a little more than 90 degrees clockwise compared to the schematic above.
Now that the sensor is connected (you made sure to test connectivity on your soldering, right?), hook your Pi back up, boot it and SSH into it. This guide assumes you will not be using Docker, but Docker may be an option (which means you can skip the next section).
Install Python 3.6+. Depending on your installation you may already have this (python3 --version). If not, try to install it via the package manager (sudo apt-get install python3.6). If this doesn’t work, you might have to compile from source (this is what I had to do). I would follow this gist, but I would run sudo apt-get install libffi-dev first, before you compile Python. Then I would recommend using checkinstall to install it as a package rather than directly onto your system. This didn’t work for me, so I ended up running make and then sudo make install.
Once you have python 3.6 or higher installed, install mqtt-io. In my case, I ran python3.9 -m venv mqtt-io and then in the directory that was created, source bin/activate, then pip3.9 install mqtt-io. Once installed, I created a config for it with the following contents:
mqtt:
  host: 192.168.1.68 # update this to your MQTT broker's IP
  topic_prefix: office/pizero # change this as you see fit, I like [room]/[device]
  status_payload_running: available
  status_payload_stopped: unavailable
  status_payload_dead: unavailable

sensor_modules:
- name: dht22_sensor
  module: dht22
  type: dht22
  pin: 4 # this may change if you add additional sensors or don't use pin 4 from above

sensor_inputs:
- name: office_temperature
  module: dht22_sensor
  digits: 2
  interval: 5
  type: temperature
- name: office_humidity
  module: dht22_sensor
  digits: 2
  interval: 5
  type: humidity
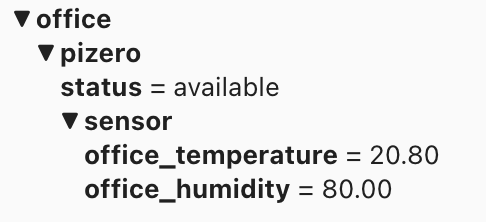
Now try to run with your config: python3.9 -m mqtt_io config.yaml. Watch the logs and MQTT to see the messages get pushed. You should see something like this:

With a humidity of 80%, you can see why I wanted to monitor it.
If it doesn’t work, check your config, your soldering, and how you wired up the sensor. It’s also possible the sensor is bad, apparently they have high failure rates.
If everything works, you can set this up to run as a service on your Pi:
sudo vi /etc/systemd/system/mqttio.service

[Unit]
Description=MQTT-IO
After=network.target
Wants=network-online.target

[Service]
Restart=always
Type=simple
ExecStart=/home/pi/mqtt-io/bin/python3 -m mqtt_io /home/pi/mqtt-io/config.yaml
User=pi
Environment=

[Install]
WantedBy=multi-user.target
sudo systemctl daemon-reload
sudo systemctl enable mqttio
sudo systemctl start mqttio
Now time to configure Home Assistant. You can use autodiscovery, but in my experience that didn’t include a unit of measure, so the values ended up showing up like this:

By manually configuring the sensors, I was able to specify the unit of measurement, which fixed that.
Add the following to your configuration.yaml:
sensor:
- platform: mqtt
  name: "Office Temperature"
  unique_id: 889d6c50-41a3-48f9-9f3f-c23e2b709670 # this can be anything unique
  state_topic: "office/pizero/sensor/office_temperature" # change this accordingly
  unit_of_measurement: "°C"
- platform: mqtt
  name: "Office Humidity"
  unique_id: 990cf7c2-4d84-4cd0-b46d-a6a7efb313e0 # this can be anything unique
  state_topic: "office/pizero/sensor/office_humidity" # change this accordingly
  unit_of_measurement: "%"
Restart Home Assistant and you should see your data coming in:

The “_2” came came from the first sensor using autodiscovery and not having units.
From here, you can see historical values or create automations based off the data.
Update: I let this run for a little bit and I did notice some data errors:

I think this is just fluctuations in the sensor itself. I would recommend you take blips like this into account when making automations. For example instead of triggering when any reading is below a certain value, trigger when it has been below a certain value for X seconds or minutes.
Alternatively, instead of using the sensor directly, you can create a filtered sensor (add this to your home assistant config in the same sensor block as above):
- platform: filter
  name: "Office Humidity Filtered"
  entity_id: sensor.office_humidity
  filters:
  - filter: outlier
    window_size: 5 # looks at the latest 5 data points
    radius: 2.0 # this removes values that are more than 2 away from the median
  - filter: lowpass
    time_constant: 10
  - filter: time_simple_moving_average
    window_size: "00:01" # increase this to make your sensor slower to change
    precision: 2 # 2 digits of precision
- platform: filter
  name: "Office Temperature Filtered"
  entity_id: sensor.office_temperature
  filters:
  - filter: outlier
    window_size: 5
    radius: 2.0
  - filter: lowpass
    time_constant: 10
  - filter: time_simple_moving_average
    window_size: "00:01"
    precision: 2
Now you can use the mean to smooth out any spikes of the default attribute for the sensors. Because the config I provided pings every 5 seconds (which ends up being every 10-20 seconds, really), I recommend a low radius if you’re using DHT-22s.

