Getting a B NAT Type on the Nintendo Switch using OPNSense

Note: This post was originally posted on my personal blog. I have copied the content to this blog.
This one caused many hours of befuddlement. I have a router running OPNSense and a Nintendo Switch, but without any modifications to my network, I get a D on NAT Type on my connection tests. I must be able to play Animal Crossing! So here’s what you need to do to get a B (or possibly better) on your NAT Type.
BEFORE YOU BEGIN: Make sure OPNSense is reasonably up to date. I’m on 19.7.4, but this is what stopped other guides from working for me. Other than this, my guide is similar to other guides on the internet.
- Connect your Switch to your network
- Get your Switch’s IP (Settings -> Internet) You can connect via both WiFi and LAN adapter and note both addresses. Ideally your address should be static DHCP, but that’s outside the scope of this article.
- Log into OPNSense and navigate to Firewall -> Aliases
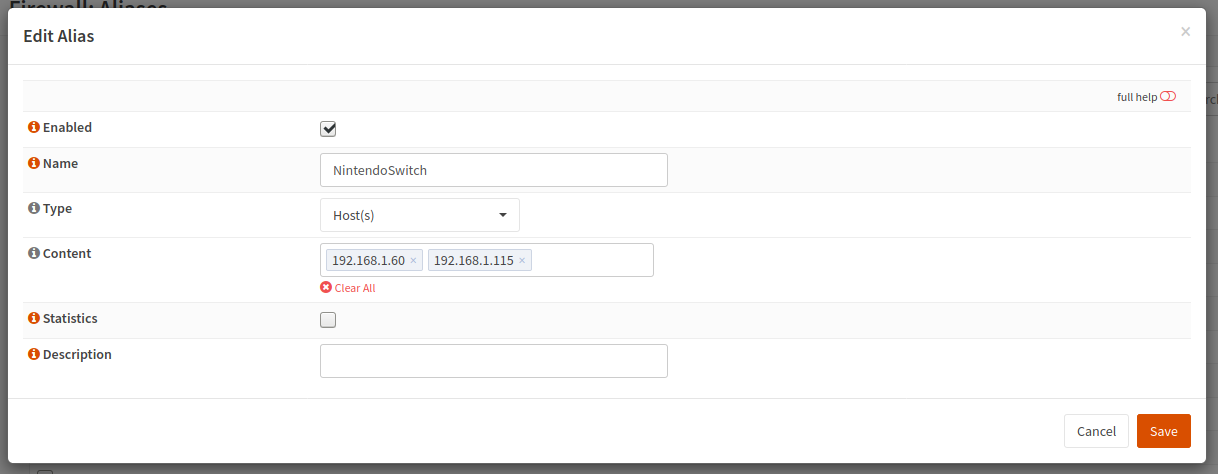
- Create a new alias (the small plus button in the bottom right) and enter this information

- Add the IPs under content like shown and click Save
- Go to Firewall -> NAT -> Outbound and click “Add”
- Under “Source address”, scroll and find NintendoSwitch
- Scroll down and CHECK Static-port!!!
- Give it a description like “NAT Nintendo Switch”
- Save
- You should see your new rule (and a popup saying you need to Apply changes)
- Check the box next to the rule, then click the arrow on the rule that the description is “Auto created rule – LAN -> WAN”
- Now click Apply changes

Do another connection test and you should now have a B type NAT.
Common pitfalls:
- Static-port not checked
- Switch IP address has changed
- Rule is not above the Auto created rule
- OPNSense is out of date
