How I Put AI to Work for My Home Security System
Note: This post was originally posted on my personal blog. I have copied the content to this blog.
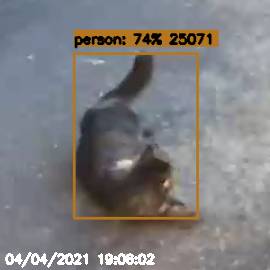
Recently I changed up my security system. Previously I was using MotionEye to watch my security cameras and when motion was detected in certain areas of the frame, it would save the video to a NAS. I then had a custom browser for these videos I wrote in PHP. (yeah…)
I caught wind of a program called Frigate that advertised using AI instead of simple motion detection, so I tried it out. Joking about the first image in this post aside, it works great (plus I would rather a false positive than a false negative). I hooked Frigate up to Home Assistant and Pushbullet and now whenever a person is detected on my security cameras, immediately (it actually takes about 2 seconds) it sends a push notification to my phone with a snapshot like the image at the top and it saves a video of it that I can browse either in Frigate itself or Home Assistant.
If you want the same thing, follow along. Keep in mind, it may take an hour or more to set up.
Overall steps:
- Set up security camera
- Install and set up Frigate
- Install and set up Pushbullet
- Install Home Assistant
- Set up Home Assistant
Setting Up Security Camera
First, set up at least one security camera. There’s a lot of leeway on this, but it has to support RTSP, and ideally it should stream h264 (check the product specs). I use Wyze Cam v2 (the v3 should support RTSP soon, but not today). If you do use a Wyze Cam v2, follow this support article to enable RTSP streaming. Once you’re all done, you should be able to hit rtsp://username:password@[ip]/live or something like that in VLC to see a live view of your camera.
Setting Up Frigate
Now that we have that set up, we need to set up Frigate. It needs somewhere to run, and since it’s published as a Docker container, you have the option to run it on unRAID or Kubernetes or Nomad or in Docker Compose. I’m running it on unRAID, so let’s continue with that.
Before we install Frigate, we need to install a dependency for MQTT. I chose Mosquitto, which has an app in the unRAID community apps. Install it and decide on a password, then run the steps in this section of the docs to set it. You can leave the rest of the options as default, unless you want to enable persistence. If so, configure this option:

There’s also an app in the unRAID apps for Frigate. Install that and configure the container’s storage as you see fit. Next configure the credentials for your camera as environment variables like so:

Also configure one for the MQTT password:

Before you save the container, create a config.yml in the config path (/mnt/user/appdata/frigate/config.yml for example). Here’s an example one:
mqtt:
  host: 192.168.1.2
  user: mqtt_user
  password: '{FRIGATE_MQTT_PASSWORD}'
cameras:
  frontdoor:
    clips:
      enabled: true
    snapshots:
      timestamp: true
    ffmpeg:
      inputs:
        - path: 'rtsp://{FRIGATE_FRONTDOOR_CREDENTIALS}@192.168.1.3:554'
          roles:
            - detect
            - rtmp
            - clips
    width: 1920
    height: 1080
    fps: 5
clips:
  max_seconds: 300
  retain:
    default: 30
detectors:
  cpu1:
    type: cpu
  cpu2:
    type: cpu
In this example, 192.168.1.2 is your unRAID server and 192.168.1.3 is your RTSP camera. The full configuration options are here.
After saving config.yml, start up the Frigate container. If it starts you should see the camera in the web interface (which is on port 5000 by default).
If you walk in front of the camera and come back to the computer, it should save a clip of it:
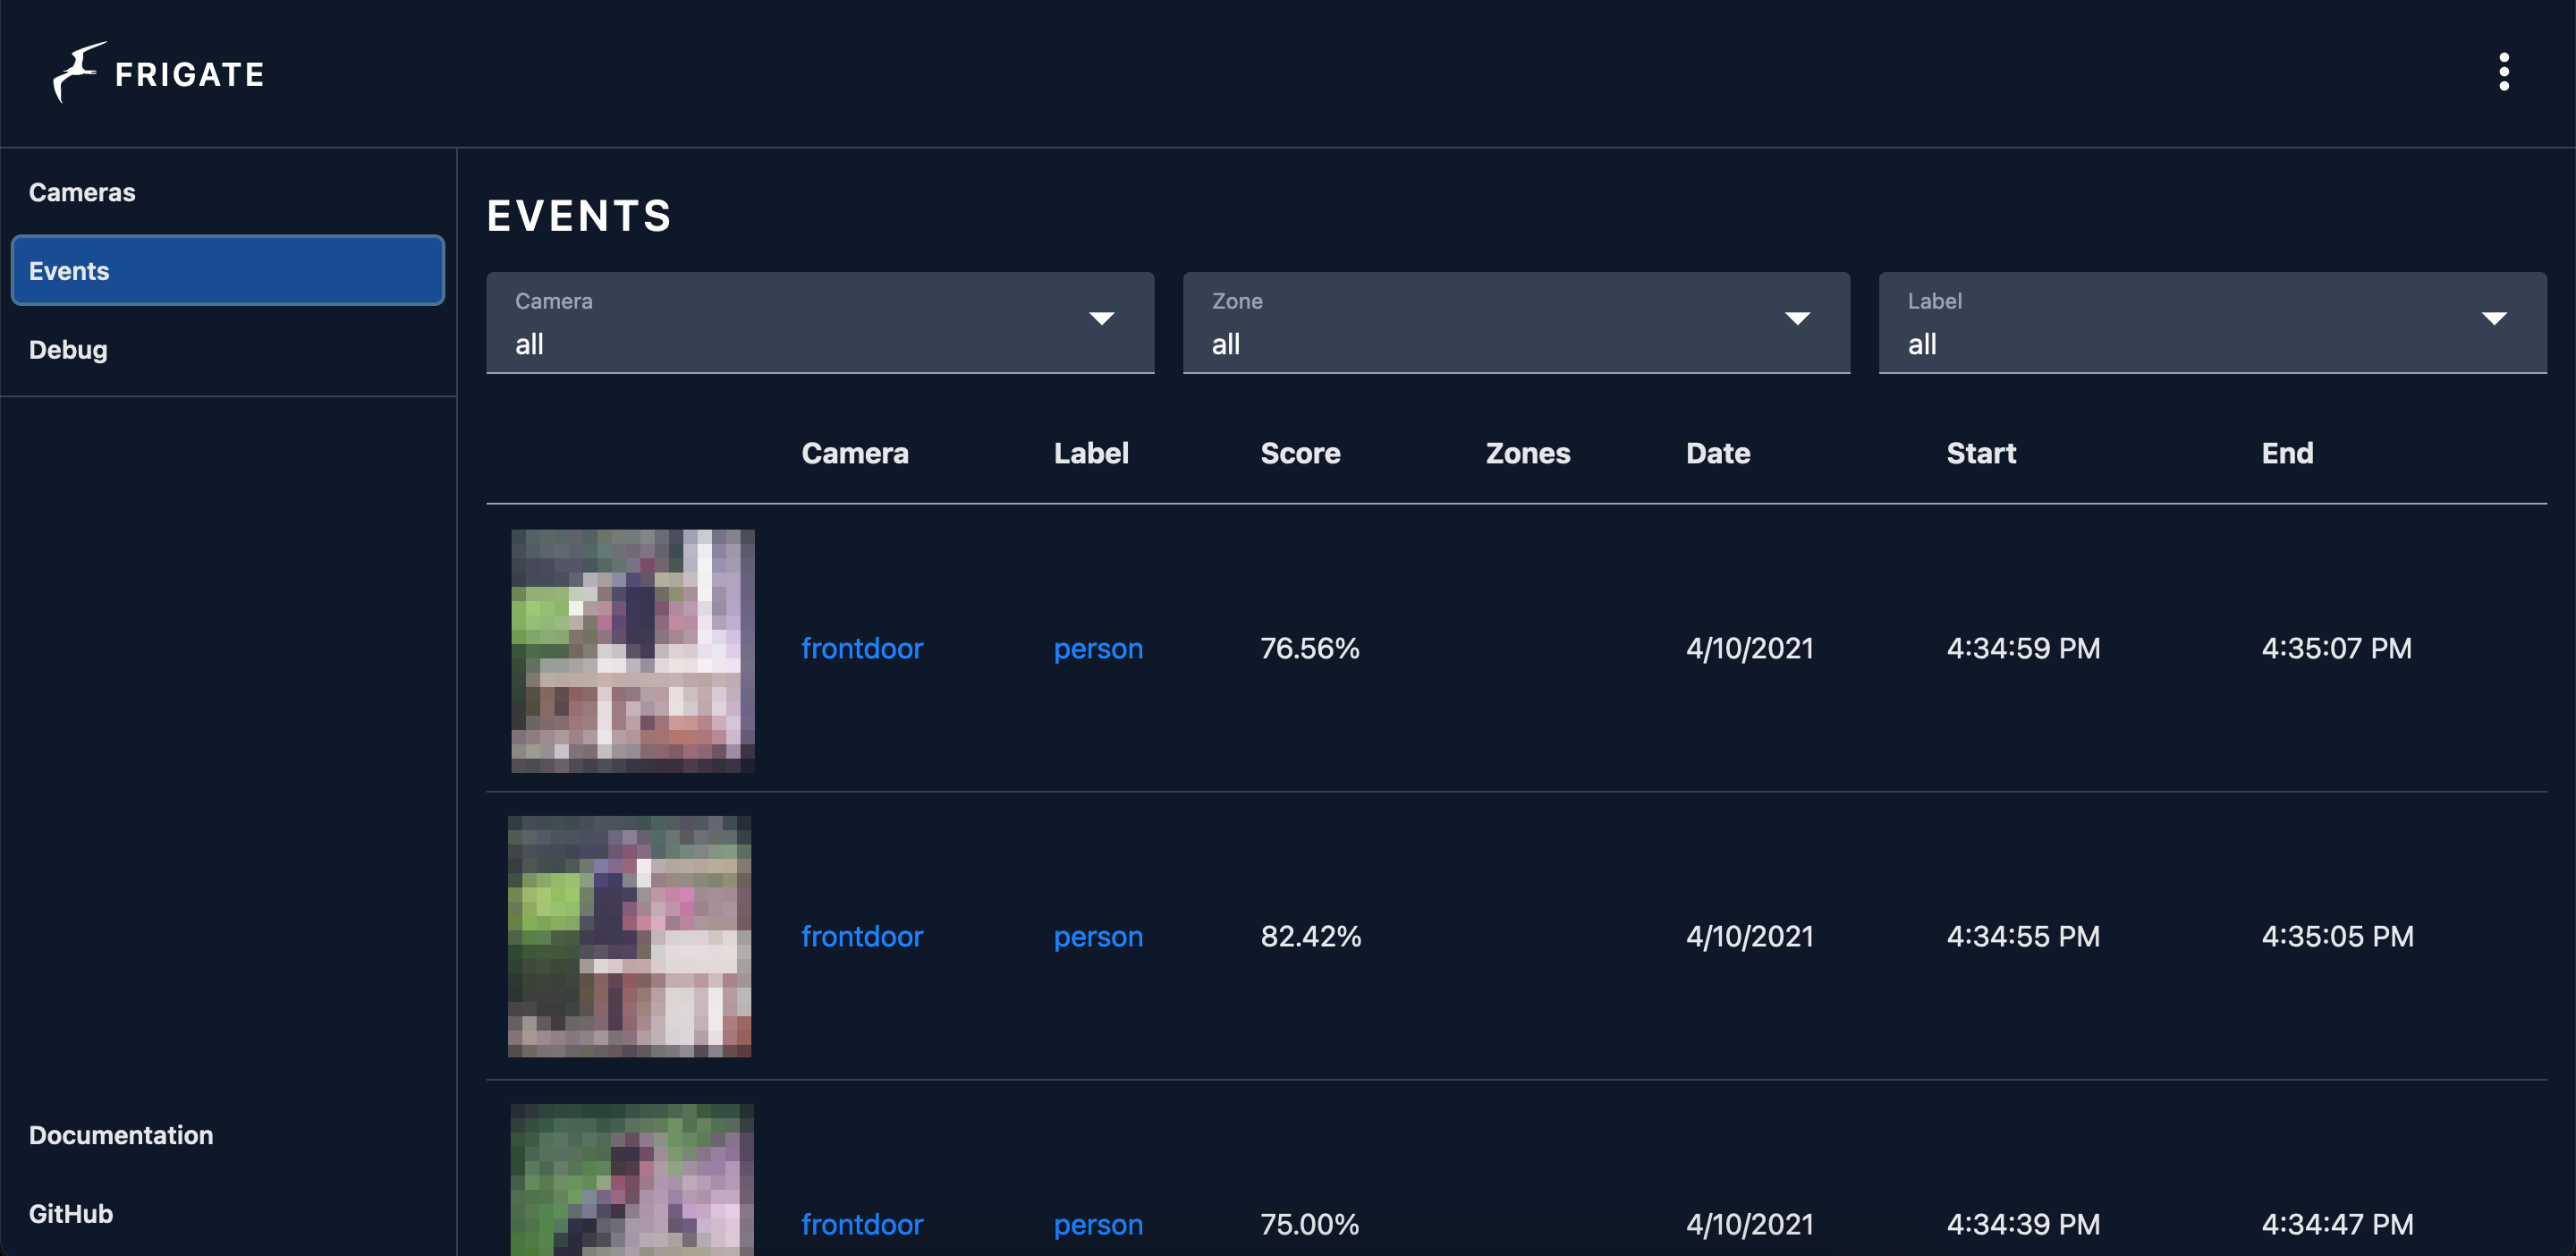
If so, great! You’re using AI to look for people in your security camera! Frigate recommends getting a Coral USB Edge TPU Accelerator since that can do inference (detection) much better than any desktop CPU. What I found is without it, the frigate container used about 2.5 cores, with occasional bursts. With it, it uses 0.5 cores steady. I think it’s unnecessary if you’re running on a decent processor and with few cameras, but if you’re on a raspberry pi it’s pretty much required. If you do get an accelerator, change the detectors part of your config to this:
detectors:
  coral:
    type: edgetpu
    device: usb
Also, if you’re on unRAID, theres a Coral Edge TPU driver in the community apps you must install (no reboot necessary).
Whew! We’re getting there!
Setting Up Pushbullet
Set up a Pushbullet account, then go to Set Up and create an API Key. Save it for the next step.
Installing Home Assistant
Home Assistant has an unRAID app like Frigate and Mosquitto, so install that. The only thing to configure is the storage so ensure that’s correct and then start the container.
Now create a secrets.yaml in that storage location and put the Pushbullet API token in it:
pushbullet_apikey: API KEY HERENow edit the configuration.yaml and add this to the bottom:
notify:
- name: pushbullet
  platform: pushbullet
  api_key: !secret pushbullet_apikey
Restart Home Assistant. Almost there!
Setting Up Home Assistant
In order to connect to Frigate, we need to install HACS, which adds additional functionality to Home Assistant. Follow this guide to install HACS. Once installed you should see a HACS button on the left sidebar.
Go to HACS, then click Explore and Add Repositories. Add this repository: https://github.com/blakeblackshear/frigate-hass-integration
Once added we can (finally) connect Frigate up to Home Assistant!
Click Configuration in Home Assistant, then click Integrations. Click Add Integration, then find Frigate. Set that up, giving it the IP address and port of Frigate. If successfully set up, when you go to the home screen of Home Assistant you should see the camera and some sensors
HOME STRETCH! Now we just need to set up the automatic notifications!
Go to Configuration, then Automations. Click Blueprints, then Import Blueprint. Import this blueprint: https://community.home-assistant.io/t/camera-snapshot-and-additional-actions-when-binary-sensor-is-triggered/255382
Now go to Automations and click Add Automation. Set it up like this:
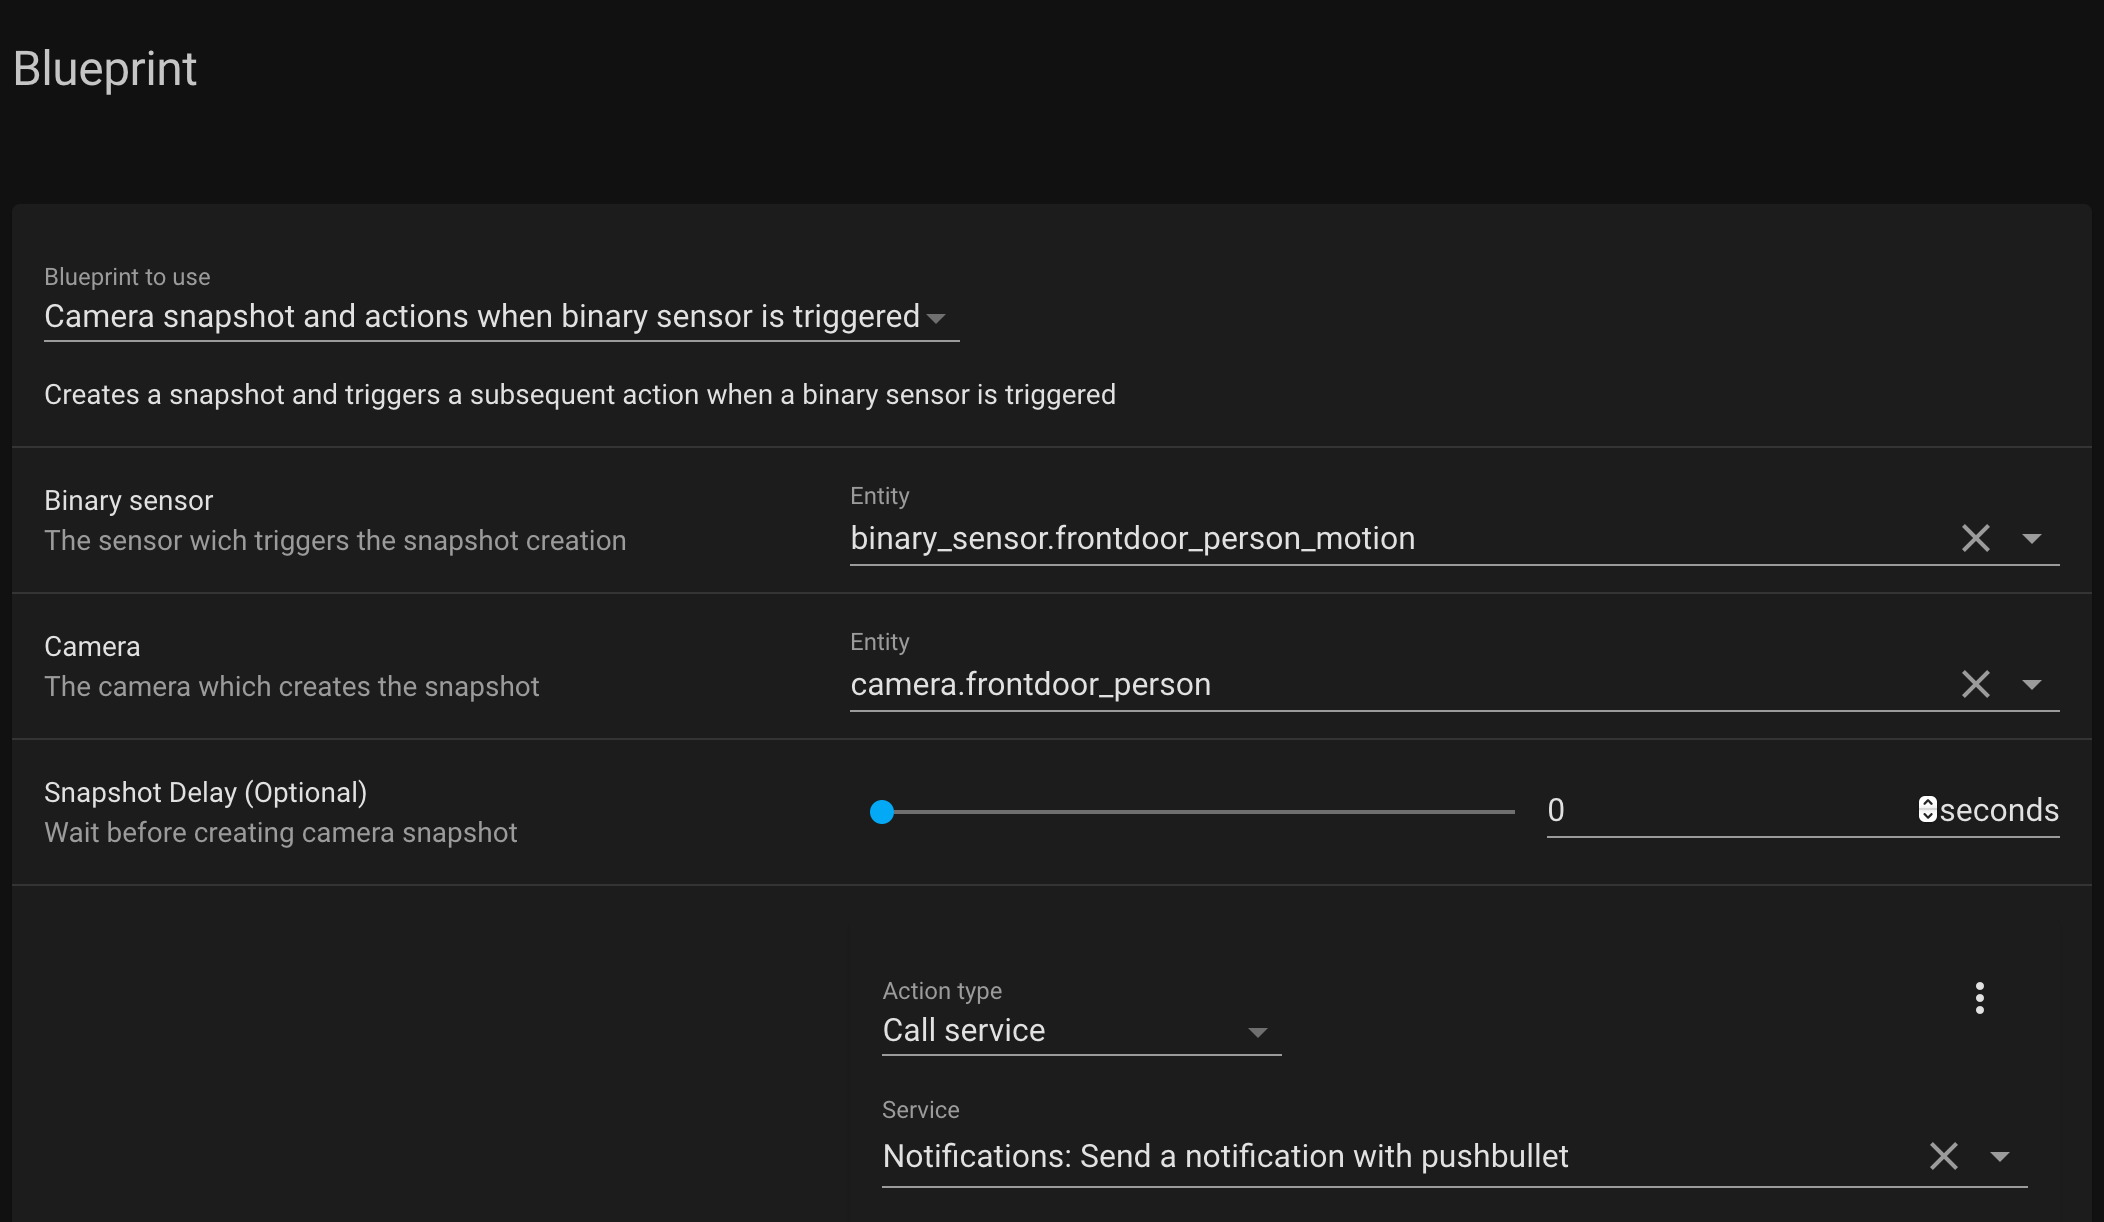
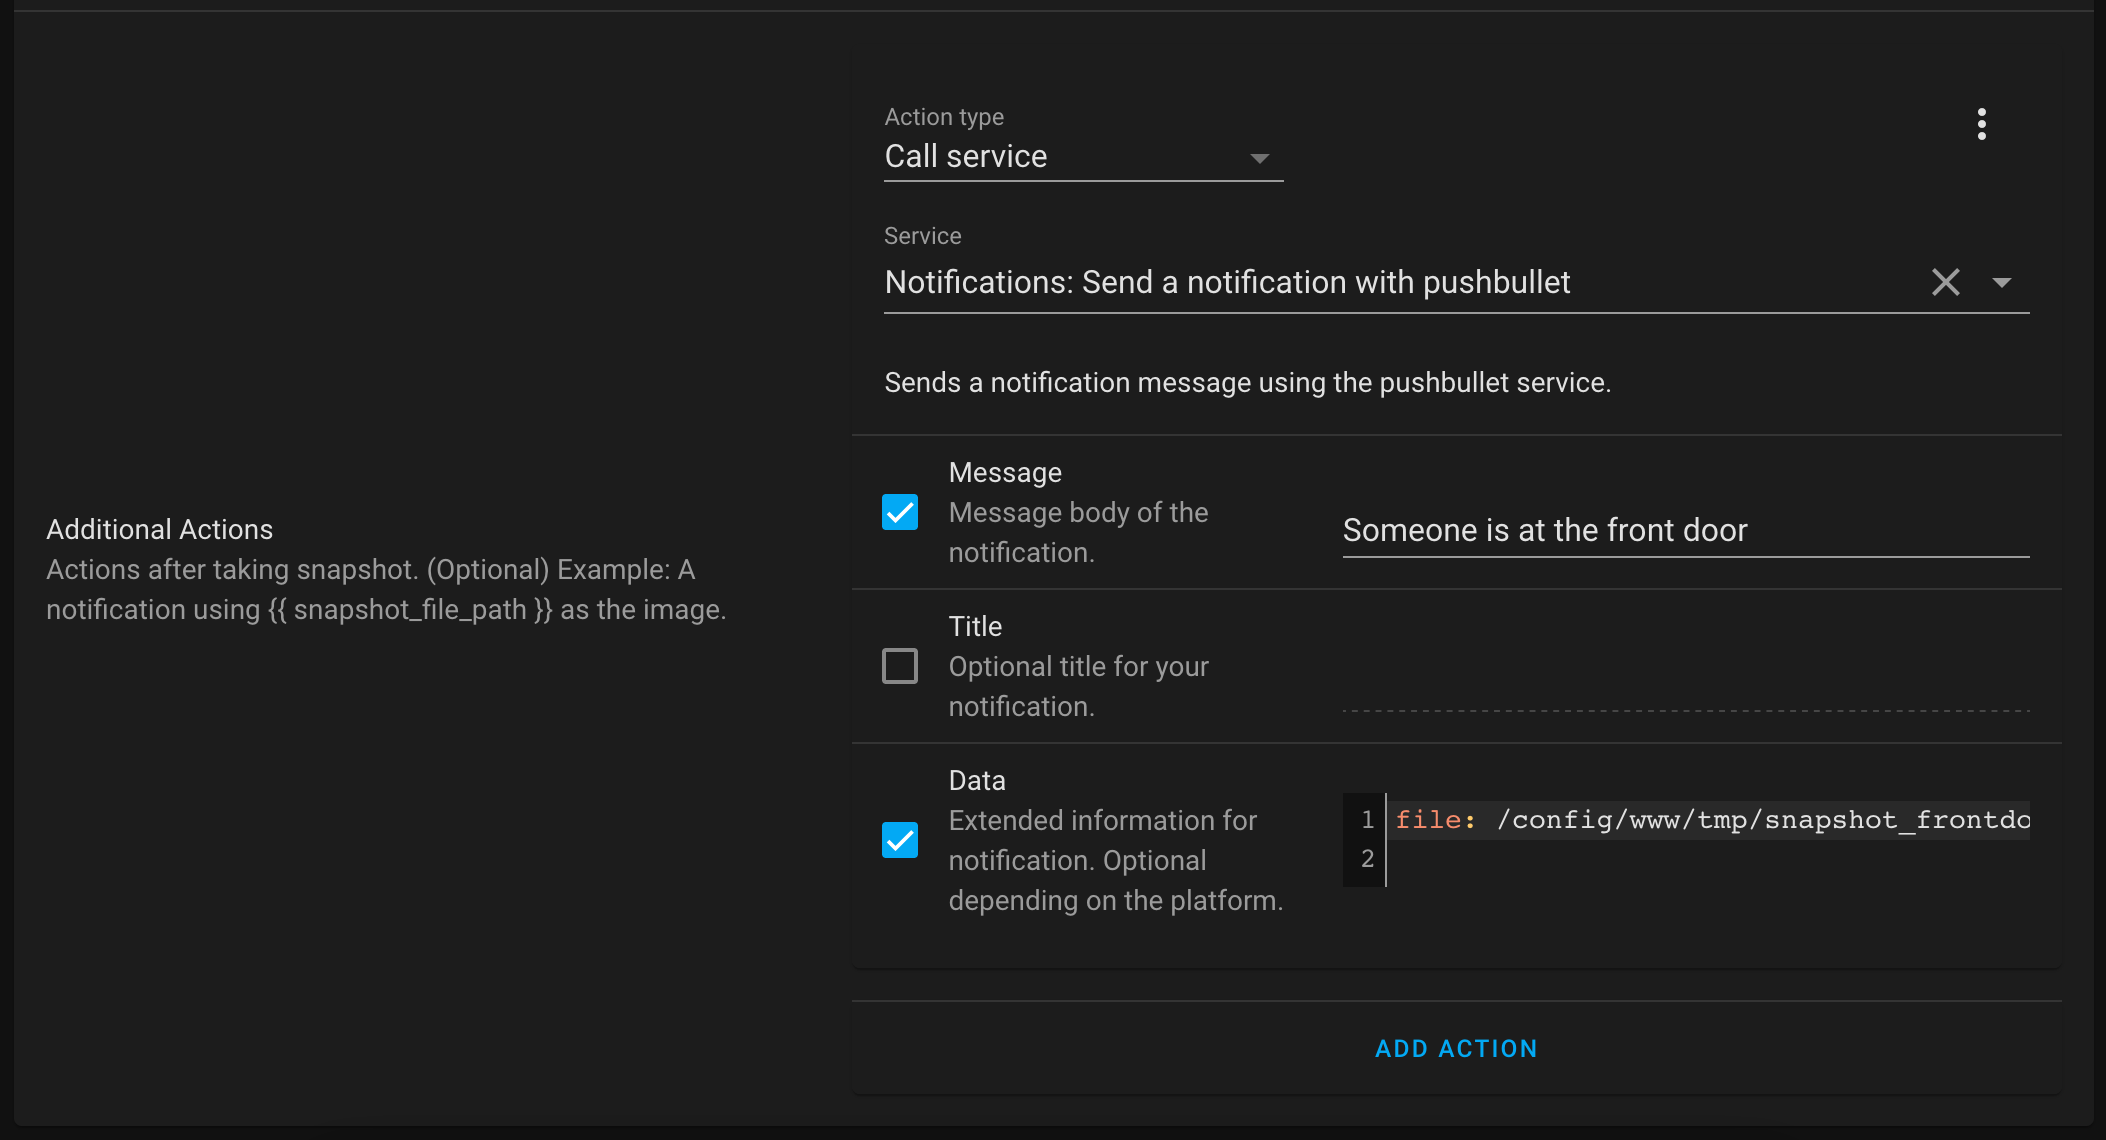
The data part is file: /config/www/tmp/snapshot_frontdoor_person.jpg. This will change depending on your camera name.
After it’s set up, walk in front of your camera. If everything works, Pushbullet should send you a message with a snapshot of yourself! Congratulations, most complicated selfie ever!
Final Thoughts
Overall the system is very solid for me. Like I mentioned, a few false positives but no false negatives I’ve noticed yet. One reason I chose Pushbullet over anything else was so that I could set the notification sound on my phone to be something different so I can immediately know that it’s my camera and not an email or something (this is the only thing I use pushbullet for at the moment).
I think the biggest advantage is I can actually be notified of stuff now. No matter what I did with MotionEye, the false positives were just way too frequent to leave notifications on. Spiders would build webs in front of the cameras and I would save dozens of videos overnight of the web rustling in a breeze. Now as long as the web doesn’t block the view of the door, I can leave it up (score one for the environmentalists!).
Right now it’s on unRAID but I’ve considered throwing it on Kubernetes. It should work, one would just have to write some manifests or Helm charts (I haven’t checked if any of the apps have already existing Helm charts). I can’t see an immediate advantage except to make the app configurations automatically backed up, plus there’s a disadvantage of having to pin it to a worker so I can use the TPU.
Future additions are just more cameras, or maybe tweaking the configuration to (intentionally, lol) detect dogs, cats and other stuff (it defaults to just people, but it’s configurable for a lot of objects).
Thanks for reading.
