How to Enable a VPN for Specific Devices on Your Network Using OPNSense
Note: This post was originally posted on my personal blog. I have copied the content to this blog.
Here’s the scenario: You have a cell phone, a streaming device and a laptop and you want to send their traffic over a VPN without having to configure the devices themselves.
Why would you want to do this? Here are some reasons:
- You don’t want sites on the internet to know where you are
- You want to make it harder for advertisers to track you
- You want ad-blocking some VPN providers offer
- You don’t want your ISP to see what you’re using the internet for
- You want to get around geo-blocking that some sites use, for example Netflix
Why is this method superior? Because it doesn’t matter what kind of device you have, because it’s the router doing the tunneling, it works with any device with no extra configuration.
Is this possible? Yes, and I’ll show you how I did it with OPNsense.
Step 1: Connect your router to your VPN
This part is simple enough. Get a VPN. I set up a VPN myself on the internet, but most VPN providers you can sign up for should work. After you do that, check your IP by searching IP on DuckDuckGo, or going to https://ifconfig.co.
Next, configure OPNsense to connect to the VPN. Usually (but not always), you’ll need to set up certificates in System -> Trust -> Authorities and then install your client certificate in System -> Trust -> Certificates.

After configuring certificates, set up the VPN under VPN -> OpenVPN -> Clients.
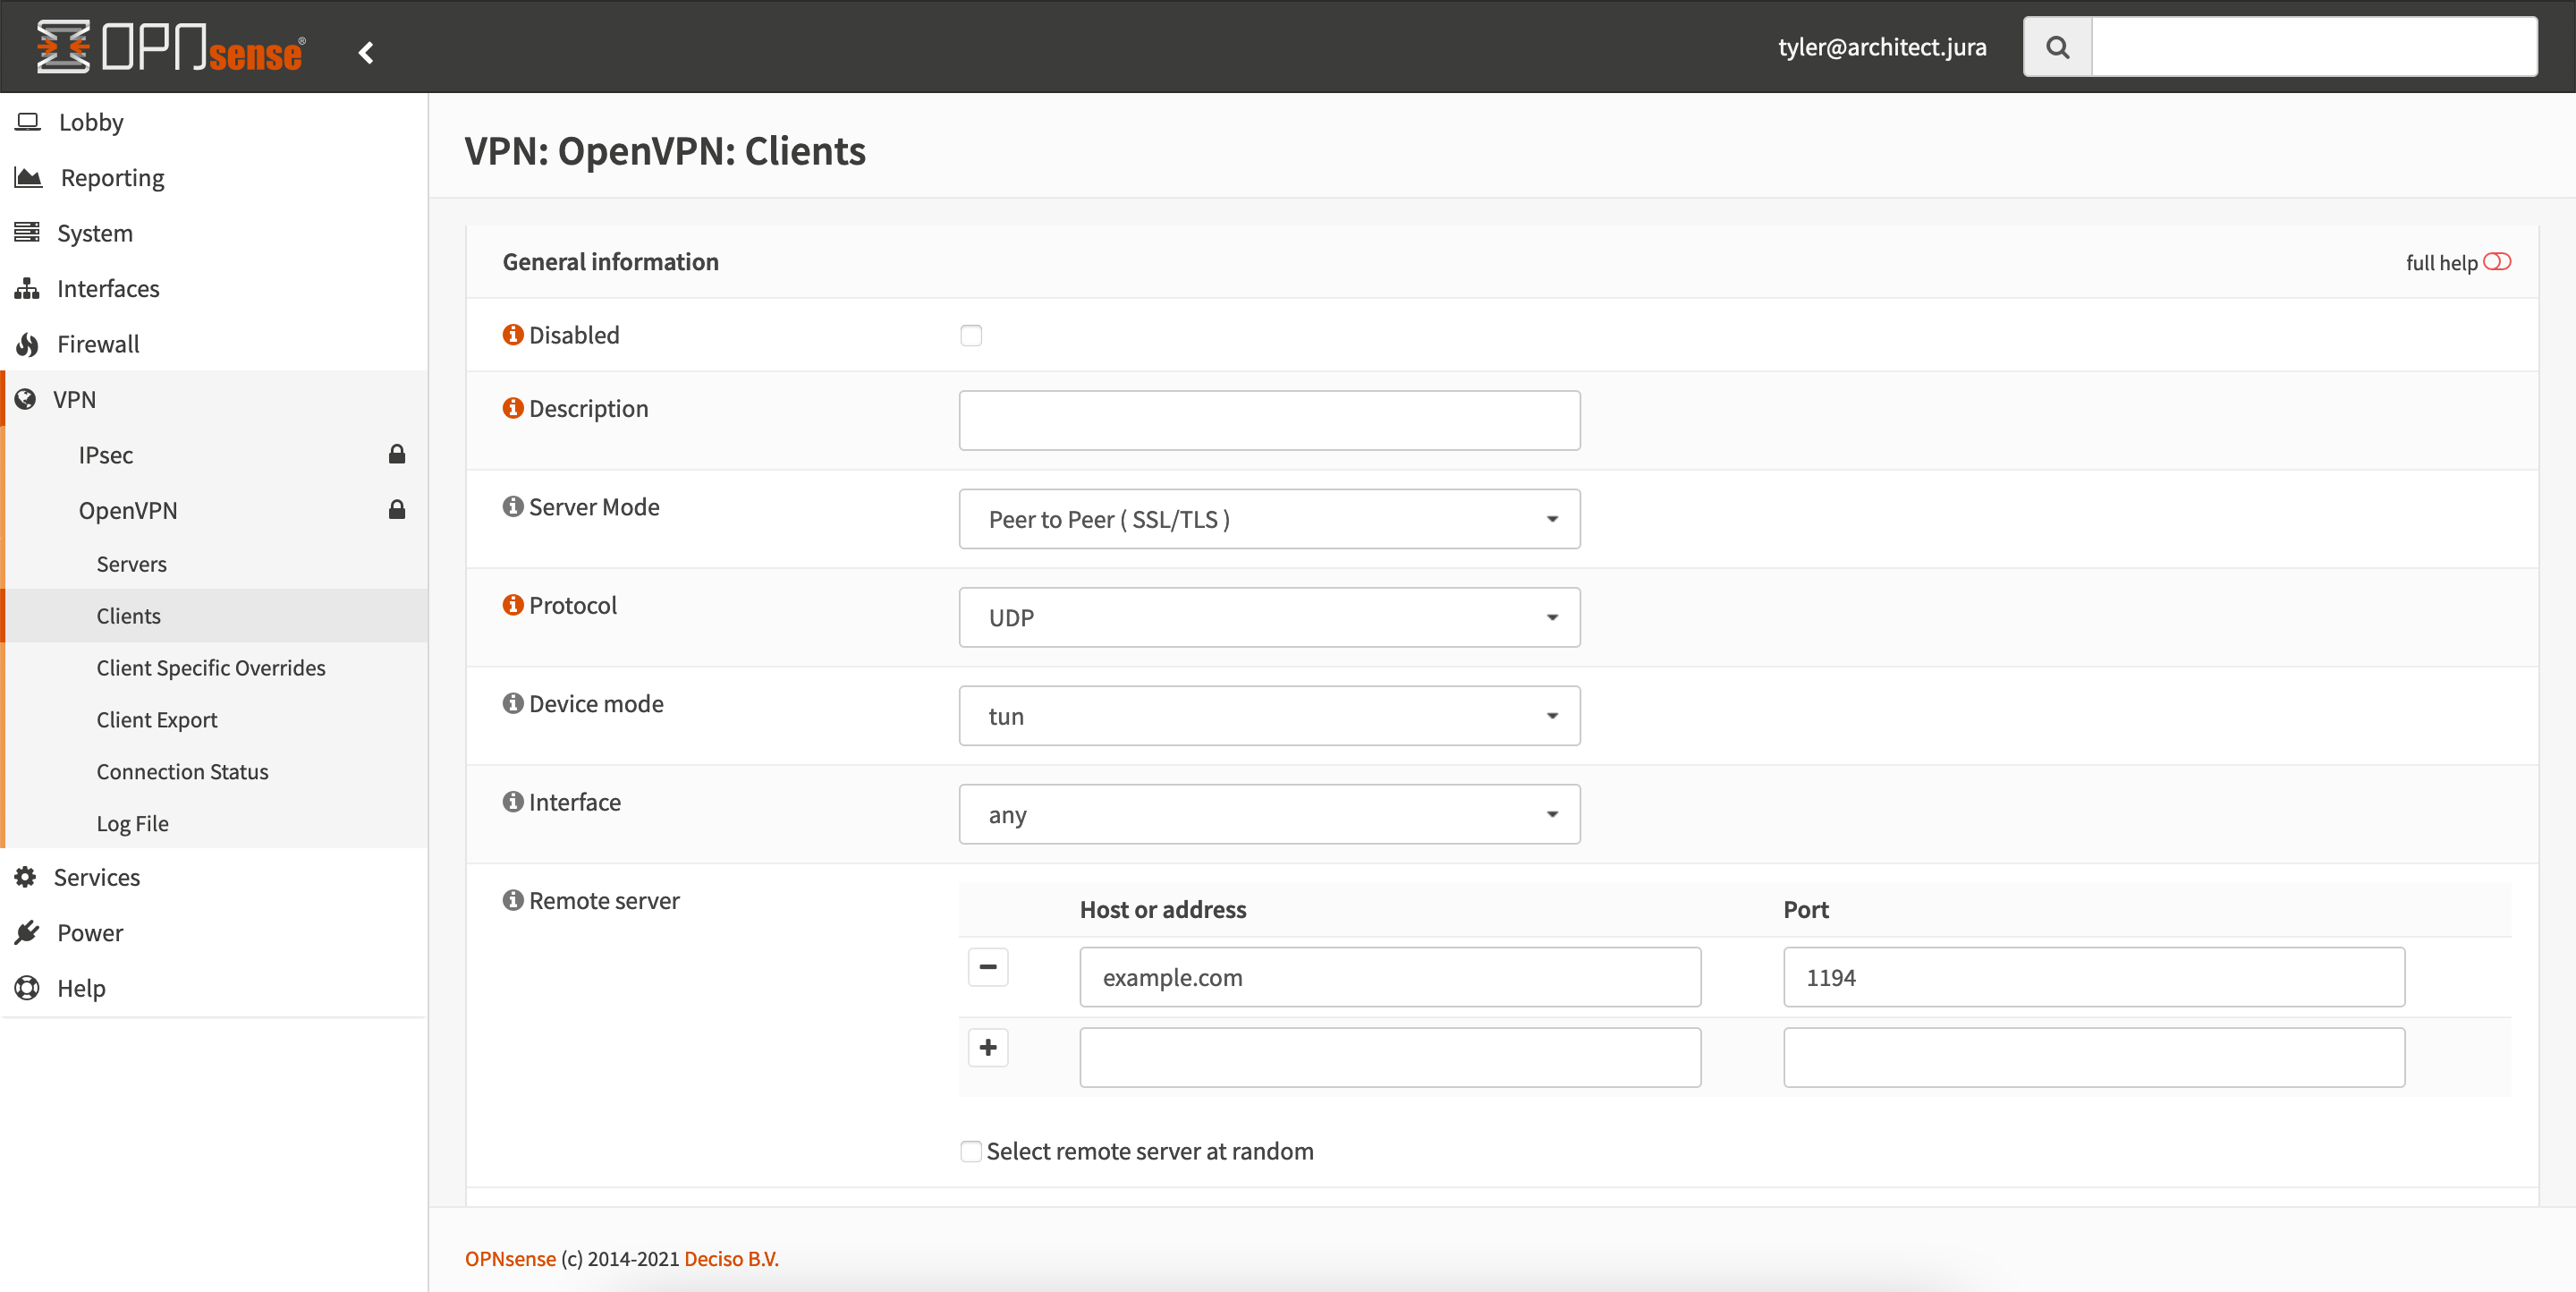
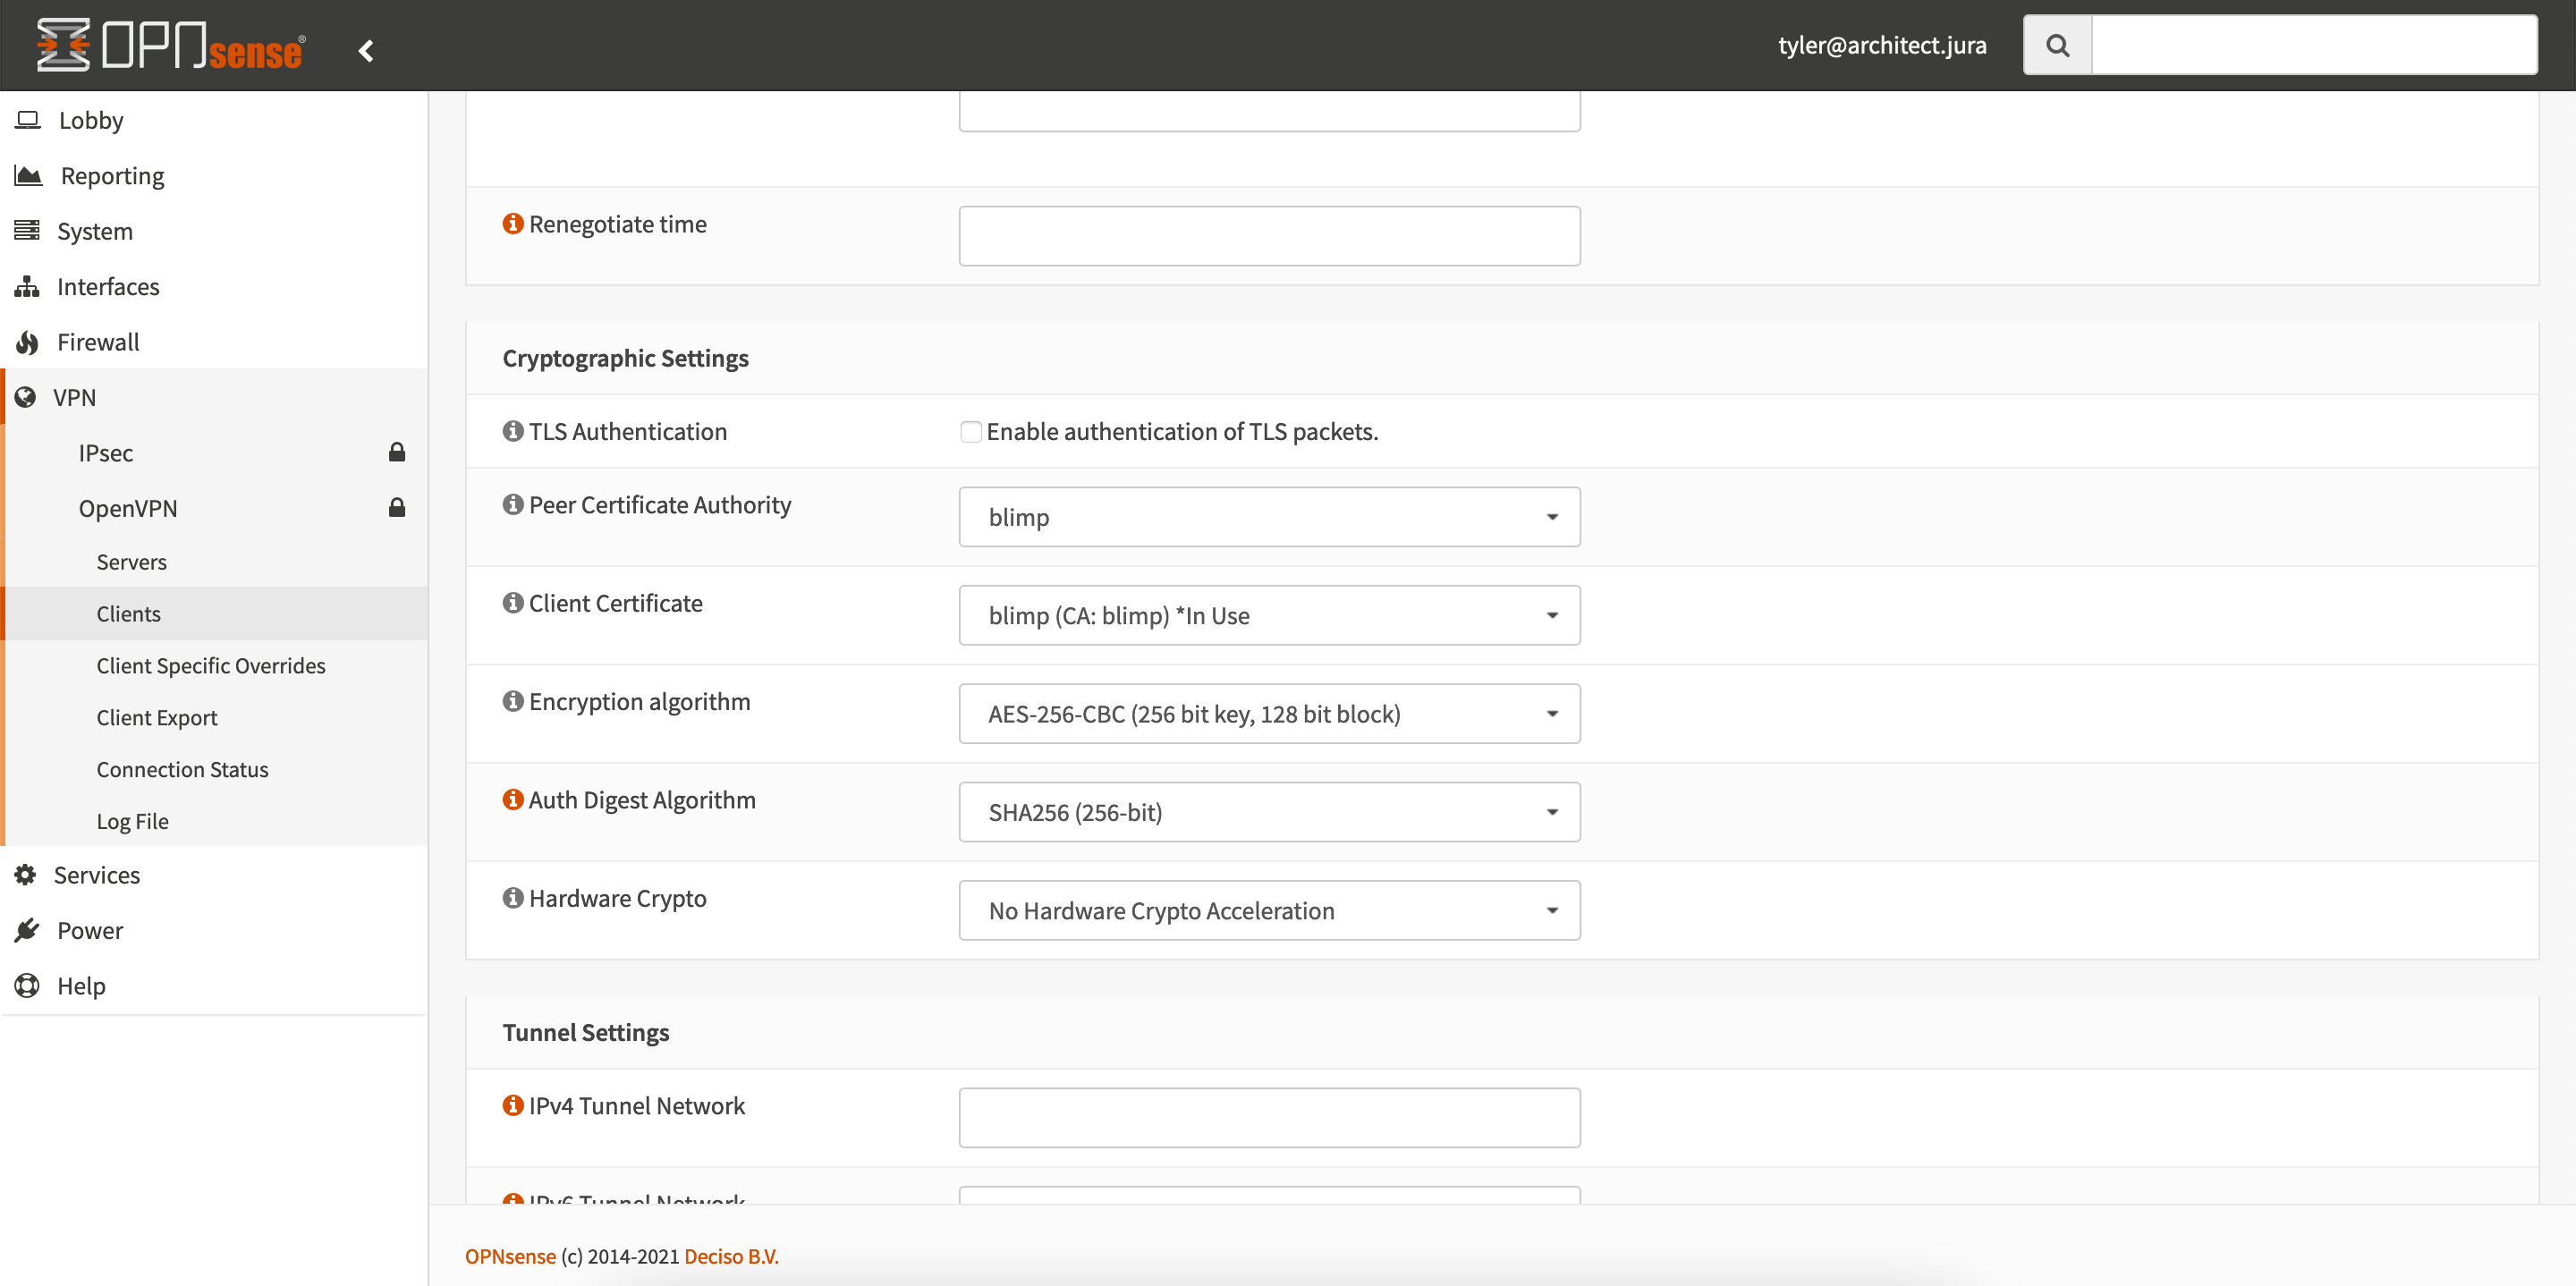
After configuring your OpenVPN client according to the settings you got from your VPN provider, click save and then go to Connection Status. There your VPN should show as connected. If not, go to Log File and read the logs to find out why.
Step 2: Set up your aliases and interfaces
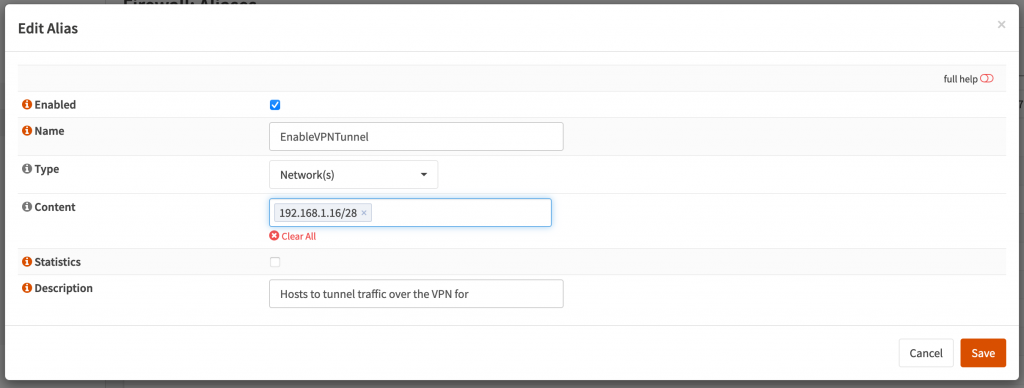
Go to Firewall -> Aliases and create a new alias. Give it a name, select Network(s) and then enter in a network with a submask. Here you can enter subnets and IPs that you want to tunnel. I personally chose to have a section of my LAN subnet selected to be forwarded over the VPN; that way if I want a device to be forwarded all I need to do is give it a static IP in that range. If you want ALL traffic tunneled, give it your full subnet such as 192.168.1.0/24.
Now go to Interfaces -> Assignments and create a new interface for your VPN, and assign it to the OpenVPN client
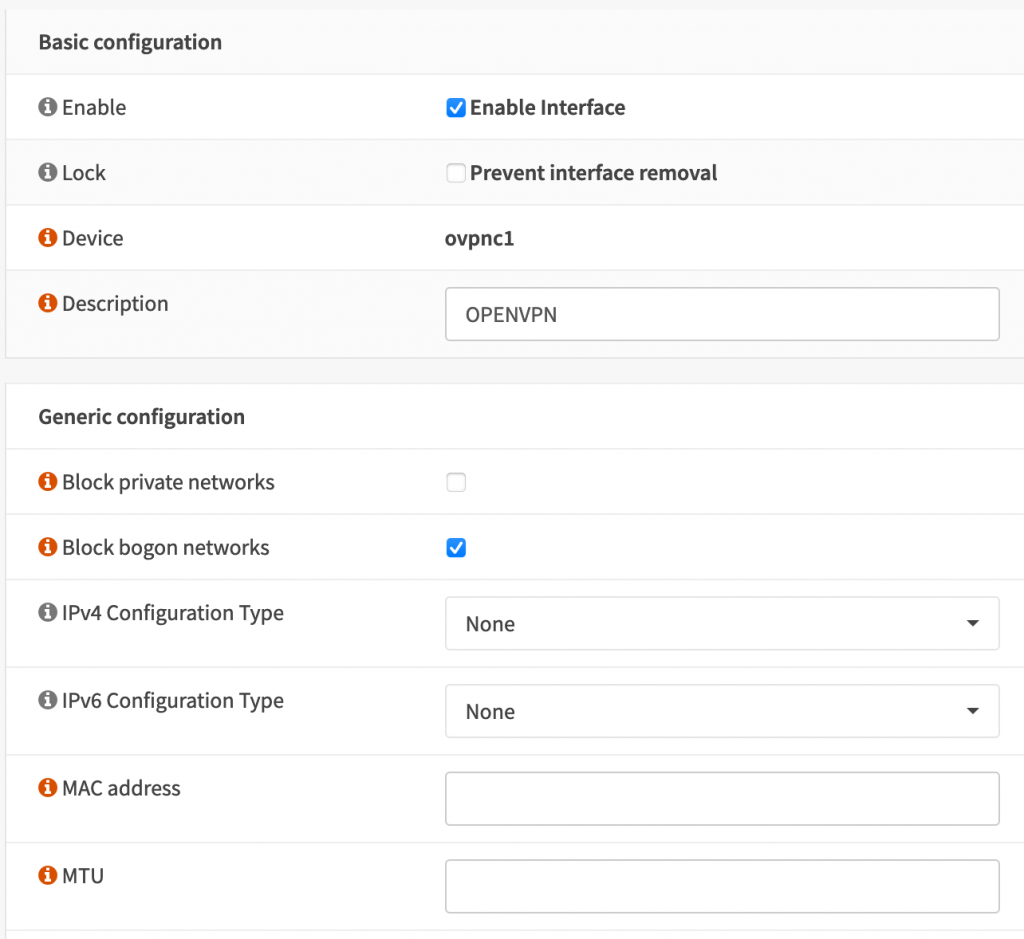

You don’t need to give it any IP assignments.
Step 3: Configure your firewall
Go to Firewall -> NAT -> Outbound and add a new rule.

Select the OpenVPN interface and select your Alias under Source address. Leave source port and destination address and port as any and select Interface Address under Translation / target. Save the rule and apply it.
Home stretch! Now we go to Firewall -> Rules -> LAN and add a new rule.
Select your alias as the Source, and set the destination as LAN Net and check Destination / Invert. This part is important! Give it a description and then select the Gateway as OPENVPN_VPNV4. This might be different depending on if you named your interface differently.
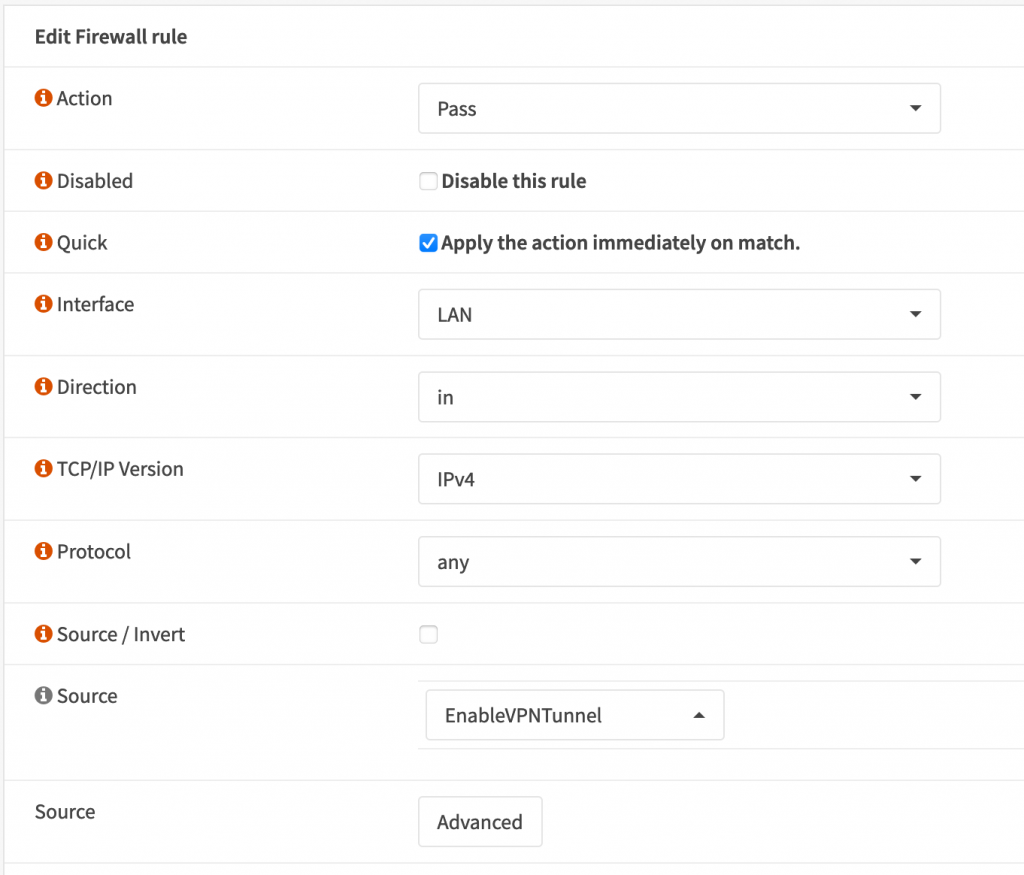

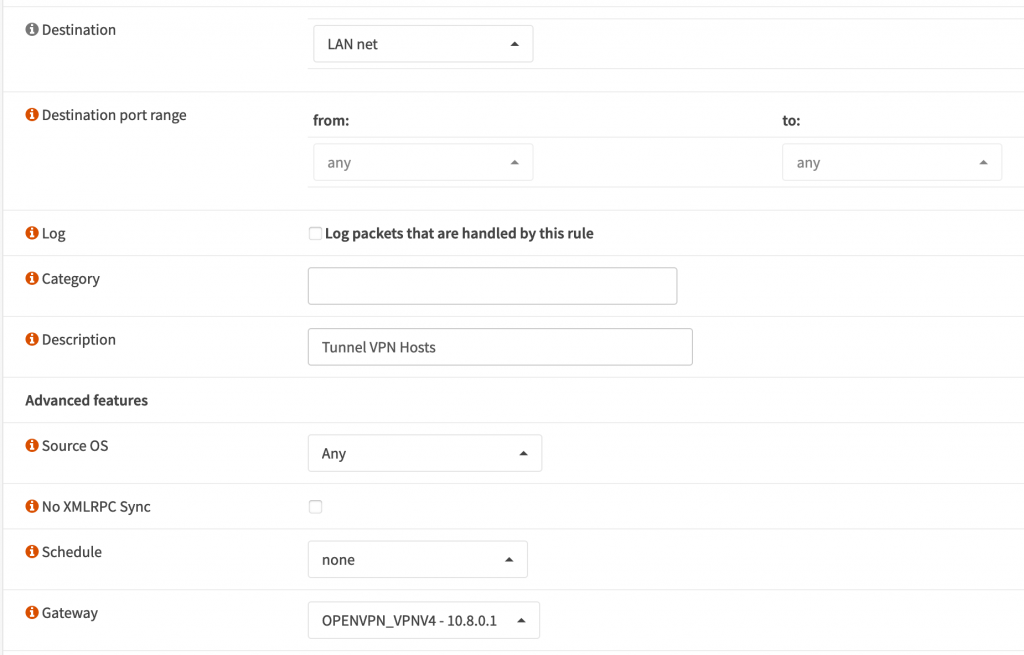
Click Save then click Apply in the top. Check your external IP again and you should see it’s changed.
